Client Testimonials Powered by PHP, XML and jQuery
One of the easiest ways to boost up the sales of your products is to show the honest recommendations of people that have already purchased them. This is content that rarely changes, and you do not need a dedicated CMS system just to manage it.
In this tutorial we are going to build a XML backed testimonial viewer, which, along with jQuery, can display the set on your product pages.
HTML
The first step is to lay down the HTML markup of the page. We are setting up a simple one-page site so we can get a better feel of the testimonial viewer in action.
index.php
<!DOCTYPE html>

<html>
<head>
<meta http-equiv="Content-Type" content="text/html; charset=utf-8" />
<title>Client Testimonials Powered by PHP and XML</title>

<link rel="stylesheet" type="text/css" href="css/styles.css" />

</head>
<body>

<div id="page">

    <div id="topBar">
        <div id="logo">
        </div>

        <ul id="navigation">
            <li><a href="#">Home</a></li>
            <li><a href="#">About</a></li>
            <li><a href="#">Buy Now!</a></li>
        </ul>
    </div>

    <div id="iPhone">
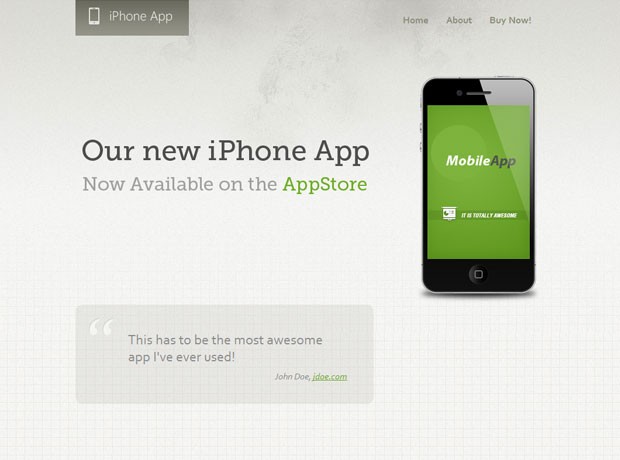
        <p>Our new awesome iPhone App is available on the appstore.</p>
    </div>

    <div id="testimonials">
        <ul>
        <!-- Generation of the testimonials takes place here -->
        </ul>
    </div>

</div>

<script src="http://ajax.googleapis.com/ajax/libs/jquery/1.4.4/jquery.min.js"></script>
<script src="js/script.js"></script>

</body>
</html>
At the top of the document, we are including styles.css, the stylesheet for the page, and just before the closing body tag, we are including the jQuery library and our script.js file, which is discussed in the last step of the tutorial.
The #testimonials div is where the magic happens. It is going to hold the client testimonials in the form of LI elements. Only the first testimonial is going to be shown on page load, and the rest will be displayed consecutively with a jQuery fade animation.

PHP
Before inspecting the generation of the testimonials, lets take a look at the XML file that powers it.
testimonials.xml
<?xml version="1.0" encoding="utf-8"?>

<testimonials>
    <item>
        <content>This has to be the most awesome app I've ever used!</content>
        <author-name>John Doe</author-name>
        <author-url>jdoe.com</author-url>
    </item>
    <item>
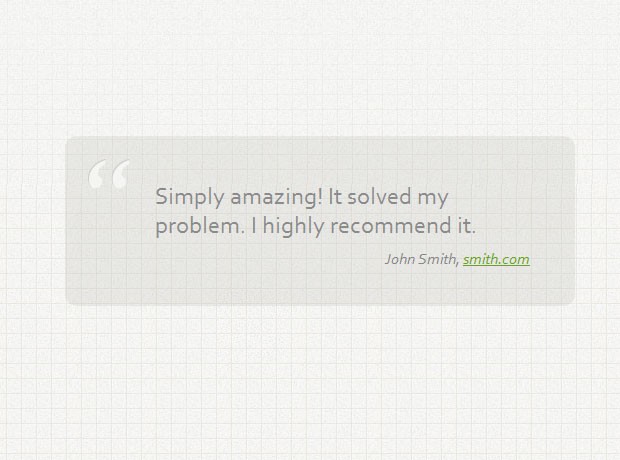
        <content>Simply amazing! It solved my problem. I highly recommend it.</content>
        <author-name>John Smith</author-name>
        <author-url>smith.com</author-url>
    </item>
    <item>
        <content>A tremendous success. It is like walking on sunshine compared to its competitors.</content>
        <author-name>John Smith</author-name>
    </item>
</testimonials>
The schema of this file is simple - the root testimonials element holds a number of items. Each item has content, author-name and author-url items, where the last one is optional, as you can see from the last testimonial. You can include an arbitrary number of testimonials by just adding more items to this xml file.
But how are we going to transform this into valid HTML? We could parse it with PHP and loop through the items, stitching together the markup, but there is an alternative approach with applying a XSLT stylesheet. This is a special XML based language, which allows us to transform a regular XML file into HTML.
transformations.xml
<?xml version="1.0" encoding="utf-8"?>

<xsl:stylesheet version="1.0" xmlns:xsl="http://www.w3.org/1999/XSL/Transform">
<xsl:output method="html" encoding="utf-8" indent="no"/>

<!-- Matching the testimonials (root) element -->
<xsl:template match="/testimonials">
    <!-- Using a for-each to loop through all the "item" elements -->
    <xsl:for-each select="item">

    <!-- This markup is going to be printed -->
    <li>
        <p class="text">
            <!-- Value-of prints the value of the select attribute -->
            <xsl:value-of select="content"/>
        </p>

        <p class="author">
            <xsl:value-of select="author-name"/>

            <!-- Using an "if" statement to check whether the URL field exists -->
            <xsl:if test="author-url != '' ">
                <xsl:value-of select="', '"/>
                <a>
                    <!-- Creating an href attribute in the hyperlink -->
                    <xsl:attribute name="href">
                        <!-- Using the concat function -->
                        <xsl:value-of select="concat('http://',author-url)"/>
                    </xsl:attribute>

                    <xsl:value-of select="author-url"/>
                </a>
            </xsl:if>
        </p>
    </li>

    </xsl:for-each>
</xsl:template>

</xsl:stylesheet>
All the standard programming constructs are supported. You can use for-each loops, if statements and you can even call built in functions (you can learn more at this XSLT documentation site). What we did here, in effect, is to extract the transformation logic from PHP and put it in a separate, presentation file.
There are two approaches when it comes to applying this XSL stylesheet. You can just include it in the XML file itself and leave it to the web browser to generate the HTML markup (all modern browsers support XSL transformations), or do it on the server side. Luckily, PHP has great support for XSL and it is really easy to use.
index.php
$xmlFile = 'xml/testimonials.xml';
$xslFile = 'xml/transform.xml';

$doc = new DOMDocument();
$xsl = new XSLTProcessor();

$doc->load($xslFile);
$xsl->importStyleSheet($doc);

$doc->load($xmlFile);
echo $xsl->transformToXML($doc);
The snippet above resides in the #testimonial div of index.php. It prints a set of LI elements after applying the XSL stylesheet to the XML document with all the testimonials. To the browser (and search spiders) everything looks like a regular HTML page.

CSS
Now that our markup is generated, lets style it. As the subject of the tutorial is primarily the back-end, we will only take a brief look at the CSS code.
styles.css
#page{
    width:800px;
    margin: 0 auto 120px;
}

#topBar{
    height:62px;
    position:relative;
}

#logo{
    width:194px;
    height:62px;
    position:absolute;
    top:0;
    left:0;
    background:url('../img/logo.jpg') no-repeat;
}

#navigation{
    position:absolute;
    list-style:none;
    right:0;
    top:15px;
}

#navigation li{ display:inline;}

#navigation li a{
    text-decoration:none;
    font-weight:bold;
    float:left;
    padding:10px;
    margin-right:10px;
    font-size: 17px;
}

#iPhone{
    height:400px;
    margin:60px auto 0;
    background:url('../img/iPhone.png') no-repeat;
}

#iPhone p{ display:none;}

#testimonials{
    width: 375px;
    padding: 45px 45px 35px 90px;
    background:url('../img/quotes.png') no-repeat 20px 20px rgba(178,178,169,0.2);
    min-height:90px;

    -moz-border-radius:12px;
    -webkit-border-radius:12px;
    border-radius:12px;
}

#testimonials li{ display:none;}
#testimonials li:first-child{ display:block;}

#testimonials ul{ list-style:none;}
#testimonials p.text{ font-size:24px;}

#testimonials p.author{
    color: #878787;
    font-size: 16px;
    font-style: italic;
    text-align: right;
    margin-top:10px;
}

#testimonials p.author a,
#testimonials p.author a:visited{
    color:#6aa42a;
}
The code above styles the page, and hides all the testimonials (which are simply LI elements inside of the main UL). After this, by using the first-child selector, we show the first one by default. It will be down to our jQuery code to cycle through the rest and show them consecutively.
jQuery
In the jQuery part of the tutorial, we will create a simple script that will loop through the testimonials and show them one by one with a fade-in animation.
script.js
$(document).ready(function(){

    // Hiding all the testimonials, except for the first one.
    $('#testimonials li').hide().eq(0).show();

    // A self executing named function that loops through the testimonials:
    (function showNextTestimonial(){

        // Wait for 7.5 seconds and hide the currently visible testimonial:
        $('#testimonials li:visible').delay(7500).fadeOut('slow',function(){

            // Move it to the back:
            $(this).appendTo('#testimonials ul');

            // Show the next testimonial:
            $('#testimonials li:first').fadeIn('slow',function(){

                // Call the function again:
                showNextTestimonial();
            });
        });
    })();

});
By increasing the value passed to the delay method, you can control the screen time for each testimonial. Moving the active one to the back (instead of keeping an index) simplifies the function implementation and allows us to call showNextTestimonial recursively.
With this our Client Testimonials viewer is complete!
Conclusion
You can use this script as a quick solution to displaying testimonials on your product pages. You can even modify it to include ratings, stars, reviews, and other kinds of custom data. At the end, it is all down to editing an XML file.
Bootstrap Studio
The revolutionary web design tool for creating responsive websites and apps.
Learn more
Very nice tutorial, keep up the good work.
jQuery never stops amazing me. Another perfect tutorial that will add a touch of elegance to any page it becomes part of. Good job!
One question, would it be smarter to lock in the height of the #testimonials box to keep longer comments from making the page longer and shorter at odd times? I know users may get confused if their browser (seemingly) randomly bumps up and down the page.
Cheers :)
This would be a nice touch.
If you have a testimonial that is considerably longer than the rest and you don't want your fixed width div to look empty, you could also put the #testimonials element into a container with a fixed height.
This way the testimonials can grow and shrink as they need to without moving the surrounding elements.
Brilliant as always :)
This is the best tutorial site ever, I was in need of creating something like this and didn't really know where to start and then all of a sudden I get this email with the tutorial, can't start right now but I will use this as the main source of my project, thanks guys, keep it up :)
this is great Greetings from mexico :)
Excellent work. The clean design is also great.
its wonderful!!!
nice!!!
<3
Wow, really nice. I'll have to use that on my next project =) Thanks
Awesome sauce! is it possible to do the same thing but instead of text, using images?
Yes, I don't see a problem. You will just need to change the schema of the testimonials.xml to include the image url and play a bit with transform.xml.
You will probably find this snippet handy to display the image (place it in transform.xml):
<img src="images/{content-image}.png" alt="{content-image-alt}" />Where content-image is an element inside the items that holds the image you want to show as a testimonial, and content-image-alt is another element that holds the testimonial in a text form (good for SEO and validation of your page). The curly braces indicate that the contents of these elements is to be fetched.
Apart from that, jQuery should handle the change nicely as long as you keep the outer LIs in the generated markup.
Really an awesome tutorial. Keep the hardwork.
Awesome tutorial as usual!
This was yet another great tutorial! Thank you.
Great tutorial - is it possible to have small buttons control moving forward and back through the quotes instead of having them automated?
Thank you so much for this. I've searched and searched for a basic text rotator that could be used not only for testimonials, but anything else my clients may have a need for.
So many sites are 2+ years old in regards to providing rotating scripts and with how quickly browsers and the internet in general is changing, I wasn't confident in using old script that would still be working in 6 months time.
I'm using the script on the website I have linked to my name here, but the site is not quite live as of creating this comment, but should be within a week's time if you want to see your script in action. We are using it for client testimonials.
Again - thank you so much. Please keep this script updated with the ever-changing browsers.
( ! ) Fatal error: Class 'XSLTProcessor' not found in G:\wamp\www\New folder\index.php on line 39
Call Stack
Time Memory Function Location
1 0.0084 368840 {main}( ) ..\index.php:0
I too have same issue, please let me know, if you got solution of this
Great tutorial, everything seems to work fine. thank you very much!
I'm getting this error, and couldnt figure it out.
<b>Warning</b>: DOMDocument::load() [<a href='domdocument.load'>domdocument.load</a>]: xmlParseEntityRef: no name in /home/gobeatni/public_html/me/site1/lib/inc/xml/testimonials.xml, line: 15 in <b>/home/gobeatni/public_html/me/site1/lib/inc/testimonials.php</b> on line <b>13</b><br />
<br />
<b>Warning</b>: DOMDocument::load() [<a href='domdocument.load'>domdocument.load</a>]: xmlParseEntityRef: no name in /home/gobeatni/public_html/me/site1/lib/inc/xml/testimonials.xml, line: 35 in <b>/home/gobeatni/public_html/me/site1/lib/inc/testimonials.php</b> on line <b>13</b><br />
How to merge it with database instead of using it XML. Is it possible, if yes then please advise us.
Thanks for a great tutorial. So clear and simple.
Many thanks, indeed!
I, too, would like to know how we can query from database to the xml file?
Thanks so much for this code, I was able to add a couple of things and it works perfectly on my client's site! I have a quick question if you have time, is there a way to get the testimonials to display in random order?
linux server need to enable the XSL extension is php-xml.
showing error in my server
Fatal error: Class 'XSLTProcessor' not found in /~path/public_html/index.php on line 39